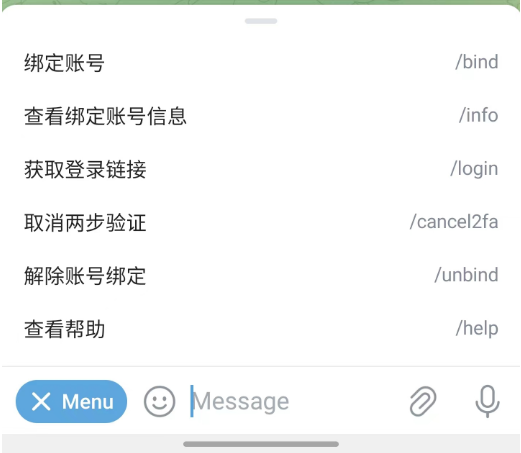
功能:用户绑定后,通过与机器人对话获取登录地址/取消两步验证等。
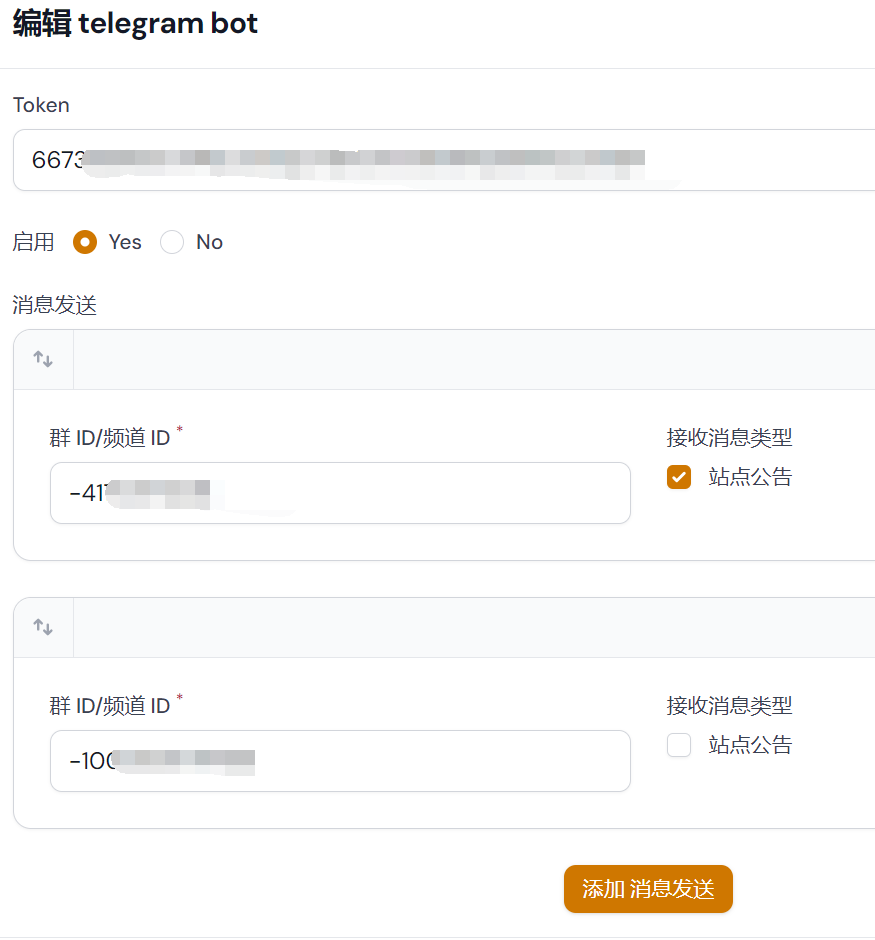
安装插件后,在新管理后台 TelegramBot 菜单,点击编辑后填入所申请的机器人的 Token,记得选择启用,点击保存即完成全部配置。
此时跟你的机器人对话,可以看到菜单有以下命令:
用户绑定后,在管理后台 TelegramBotBinds 菜单能看到绑定信息:
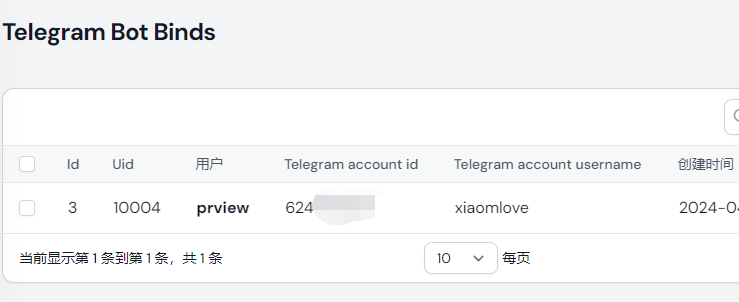
管理人员可以手动删除记录进行解绑,用户自己解绑也会将记录删除。
在消息发送那一栏,可以填入多个群ID/频道ID,把机器人添加进去并设置为管理员和添加相应权限,可以将站点的一些消息发送过去并置顶。目前支持发送站点公告。
| 包名 | xiaomlove/nexusphp-tgbot |
| Gitee ssh | [email protected]:xiaomlove/nexusphp-tgbot.git |
| Github https | https://github.com/xiaomlove/nexusphp-tgbot.git |
| 适用版本 | >= 1.8.12 |
安装步骤:
composer config repositories.tgbot git https://github.com/xiaomlove/nexusphp-tgbot.gitError retrieving releases
composer require xiaomlove/nexusphp-tgbot
php artisan plugin install xiaomlove/nexusphp-tgbot
1条评论